Showing posts with label decor. Show all posts

Sunday, August 25, 2013

DIY Faux Roman Blind


Hi! Hope you had a great weekend!!!

Today I'll be showing you how I made a Faux Roman Blind.


I had 2 eyelet curtains from our previous home. I used the 1 to reupholster our coffee table. The other 1 came in handy when I wanted to make a blind/valance for the dining room window. 

Let's get started...


I spread the curtain on the dining room table. My husband measured the holes in the wall and put some screws into the wooden plank - what a sweetie! 


I cut off the eyelets to just use the fabric. It was super easy to use, because the seams were already there. My kind of project ;-)


Measure the window. Mark and cut the fabric to the window's measurements, leave quite a bit for seam allowance.


I used the staple gun to secure the one end of the fabric to the wooden plank. I left the screws in the plank so that it won't be visible from the front.


 I secured the fabric to the rest of the top of the plank. I folded the corners in and stapled it secured. I didn't really care to do it neatly as this side will face the wall...


Next I 'seamed' the left and right side of the blind. I used the existing seam as a guideline. I used Bostik's No-Sew Glue, it's so easy to use. I just put a little on, wait a few minutes and 'seam' the fabric.  I did the same with the bottom seam.


And that's how easy it is to make your own faux roman blind!!


Enjoy your week!!

Follow on Bloglovin  
** Linking up at these parties & @ Watch Out Martha & at this  party  @Clean & Scentsible **

Thursday, August 15, 2013

How To Use Old Window Frames in Decor


Hi!

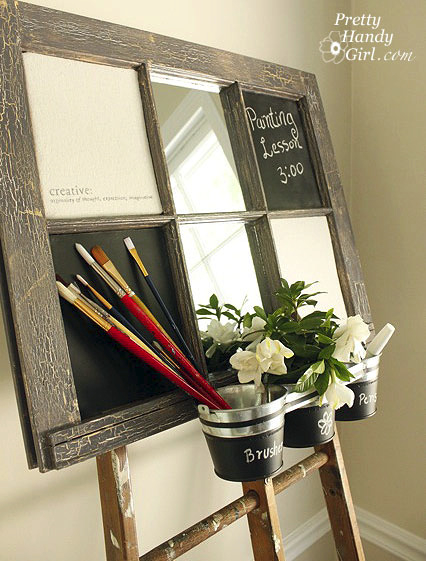
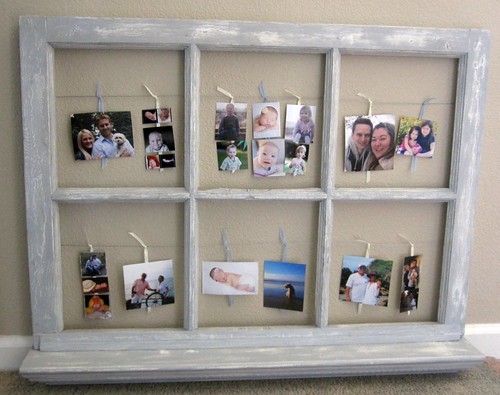
I recently scored this lovely at a house-market. I didn't really need it (or have an open wall for it), but I got it for a steal.And it's so pretty, I couldn't resist!!!


I'm still not sure what I'm going to do with it, so here's a few ideas:


window wall art


via

IMG_4313
via


via


via

All of these projects are fabulous, I'm no closer to deciding what to do with my old window frame...!!
Any suggestions?

Check back to find out what I've decided...

Enjoy the weekend!!! Check out my new Facebook page.

Follow on Bloglovin


Sunday, August 11, 2013

TV Cabinet Makeover: Take 1 - How to Paint & Stain Laminated Wood


Hi Everyone!

As part of my quest to make over our living room I wanted to paint our TV cabinet. Today I'll show you how I did it  :-)


We bought this laminated wood cabinet just after we got married (read: we needed something cheap). Needless to say the color and style is all wrong for our new home. I'm fairly OK with painting wooden furniture, but laminated wood is a whole other story. I did TONS of research.

Here's the official BEFORE photos. It is a BIG piece and very heavy.


Ok so here goes my version of how to paint laminated wood (the cheap and easy way):

I started off by making sure the cabinet is dust free and then I took off the hardware (as you can see it's very modern and not at all the look I want). I also filled the holes with wood-filler

.
Next I painted the cabinet with two coats of Plascon Multi-Surface primer and a sponge roller. That dried for a few hours and then the actual paint followed, I used Harlequin Paints Provencal Furniture Paint  in French White. Below you can see that it was quite the mission to get an even coverage.


I was happy with the overall look after three coats of the French White (no photos, I was too anxious to begin with the staining :-) ). For the staining I used Harlequin Paints Antiquing Liquid. It's very runny and easy to work with. I applied it with a paintbrush and did the rest with mutton-cloth.

If you never did staining before I'll explain a little how I do it. Make sure you only do small sections at a time. I apply the staining liquid with my paintbrush in rough strokes and then immediately use the mutton-cloth to lightly wipe off excess liquid. I tend to use circular motions as it leaves a more natural look. Here is an all-done drawer:


I chose not to distress the cabinet as the lines are very modern and there's not any detail on the surface.

Below is the new feet I got from here. I just adore them, it gives the cabinet a whole new 'vintage-y' vibe. WAY more in line with what we want! I followed the same steps to paint the feet as the cabinet.


Are you ready to see the final reveal? I was sooo excited about this...


Until I was NOT so excited... Can you tell from the bad quality photo? I don't have any real reasons, but I just did not LOVE the new look. My husband did, my mom did and my best friend did. But I was not feeling it... :-( I love the new hardware and the feet, though.

Hence the title, TV Cabinet Makeover: Take 1. Stay tuned for Take 2 later on. (Hint: I REALLY loved it!!!)

PS. Overall I found painting laminated wood very easy (the smoothness is so easy to paint!), and will certainly try it again on another piece.

I would love to hear YOUR opinion on the makeover!

Have a blessed week!
Follow on Bloglovin
**Linking up here & Serenity Now**

Thursday, August 8, 2013

Greatest No Knit Yarn Ideas


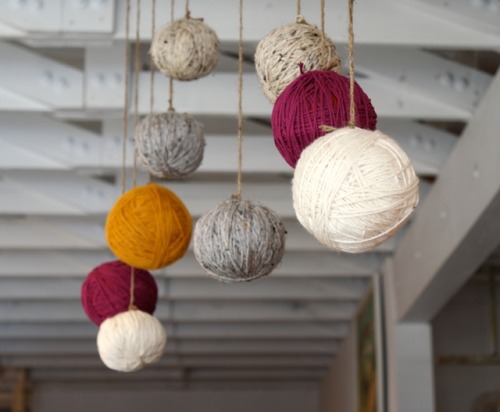
Helooo! As spring is approaching in South Africa (it's still rainy and cold in Cape Town, but I can dream, right?) I wanted to start making a spring wreath for our front door. I found a few made of yarn and started to see other yarn projects. I gathered up the prettiest ones for you... Enjoy!


**Please Pin from original source**


IMG_7841-1


DIY Yarn Typography Installation


Thanks so much for visiting! Check back Monday for a fresh DIY project!


** Linking up at these parties & My Repurposed Life & Serenity Now **


Follow on Bloglovin

Related Posts Plugin for WordPress, Blogger...