Showing posts with label living room. Show all posts

Tuesday, September 10, 2013

TV Cabinet Makeover: Take 2

Hi everyone!!

Remember when I shared with you Take 1 of the Cabinet Makeover?

Now here is the FINAL look after I repainted it, I'm in LOVE with this!!!!


It started out like this after the previous attempt to change the cabinet:


I taped off stripes how far I wanted them apart. It actually worked out great in the end. Then I painted every other stripe with Annie Sloan Chalk Paint in French Linen.


The remaining stripes was painted with French Linen mixed with a little Old White. I wanted a very similar colour, just lighter.


I think it looks pretty amazing!!!


Have a blessed week!!!

** Linking up here & at this party!!! **


Sunday, August 18, 2013

Drab to Fab Candle Holder Makeover

Hi there!

Today I'll share this very easy makeover with you. A few years ago I bought these red, shiny candle holders, they were on sale after Christmas. I bought them with the idea to paint them, but I never came around. If I knew they can look so stunning, I would have done it long ago :-)


Here's the BEFORE. I don't like it at all...


I painted it with 2 coats of Annie Sloan Chalk Paint in French Linen mixed with a little Old White. No sanding or prepping!!!

I just love how it blends in with the rest of our decor now.


Here's the candle holders in the living room:


Thanks for visiting! Have you liked my new Facebook page ?

Follow on Bloglovin


Sunday, August 11, 2013

TV Cabinet Makeover: Take 1 - How to Paint & Stain Laminated Wood


Hi Everyone!

As part of my quest to make over our living room I wanted to paint our TV cabinet. Today I'll show you how I did it  :-)


We bought this laminated wood cabinet just after we got married (read: we needed something cheap). Needless to say the color and style is all wrong for our new home. I'm fairly OK with painting wooden furniture, but laminated wood is a whole other story. I did TONS of research.

Here's the official BEFORE photos. It is a BIG piece and very heavy.


Ok so here goes my version of how to paint laminated wood (the cheap and easy way):

I started off by making sure the cabinet is dust free and then I took off the hardware (as you can see it's very modern and not at all the look I want). I also filled the holes with wood-filler

.
Next I painted the cabinet with two coats of Plascon Multi-Surface primer and a sponge roller. That dried for a few hours and then the actual paint followed, I used Harlequin Paints Provencal Furniture Paint  in French White. Below you can see that it was quite the mission to get an even coverage.


I was happy with the overall look after three coats of the French White (no photos, I was too anxious to begin with the staining :-) ). For the staining I used Harlequin Paints Antiquing Liquid. It's very runny and easy to work with. I applied it with a paintbrush and did the rest with mutton-cloth.

If you never did staining before I'll explain a little how I do it. Make sure you only do small sections at a time. I apply the staining liquid with my paintbrush in rough strokes and then immediately use the mutton-cloth to lightly wipe off excess liquid. I tend to use circular motions as it leaves a more natural look. Here is an all-done drawer:


I chose not to distress the cabinet as the lines are very modern and there's not any detail on the surface.

Below is the new feet I got from here. I just adore them, it gives the cabinet a whole new 'vintage-y' vibe. WAY more in line with what we want! I followed the same steps to paint the feet as the cabinet.


Are you ready to see the final reveal? I was sooo excited about this...


Until I was NOT so excited... Can you tell from the bad quality photo? I don't have any real reasons, but I just did not LOVE the new look. My husband did, my mom did and my best friend did. But I was not feeling it... :-( I love the new hardware and the feet, though.

Hence the title, TV Cabinet Makeover: Take 1. Stay tuned for Take 2 later on. (Hint: I REALLY loved it!!!)

PS. Overall I found painting laminated wood very easy (the smoothness is so easy to paint!), and will certainly try it again on another piece.

I would love to hear YOUR opinion on the makeover!

Have a blessed week!
Follow on Bloglovin
**Linking up here & Serenity Now**

Sunday, July 28, 2013

Coffee table/Ottoman Extreme Makeover


Hi there!

As part of transforming our living room to become like this. I gave our dark ottoman/coffee table a makeover. This was by far one of my favorite projects and I'm in love with the end result.


Let's get started. This is what I was working with ... Not so nice!


I had leftover eyelet curtains from our previous home that I can't use in our new home. So what do you use old curtains for? You upholster coffee tables, of course!

This is what I was going for...


I draped the curtain over the ottoman to cut of the ends I'll won't need. I didn't even bother to cut straight as nobody will ever see my laziness :-) . When I had the right size going I grabbed my stapler gun (yup this is ALL equipment you need for this project!!).


I started by attaching the one side of the curtain very tightly to the base of the ottoman. Again not my neatest job!!


The only slightly tricky part was to fold in the corners, in the end I did it just as you would wrap a present. Like this...


And that is all! It was one of the fastest projects with the most extreme difference.


Just one more look... Oh I love this now!


Thanks for stopping by!
Follow on Bloglovin
Linking up at these parties & at Clean & ScentsibleSerenity NowBe Betsy.

Thursday, July 11, 2013

Inspiration: Neutral living


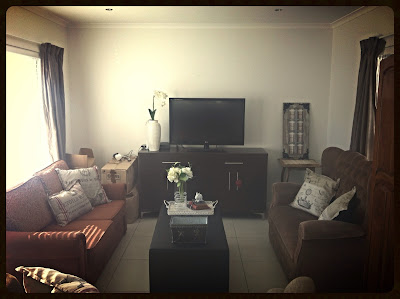
As I've mentioned, we just moved into our very first home. So there is LOTS happening around here... I've been having trouble with our living room that started out like this...


Haha, no just kidding! That was the day we moved in.


Our style is more light, airy and shabby chic than modern. We like light colors (think beige, white, greige, I know =  boring). Anything BUT the colors in the photo (how did we end up with all this stuff NOT in our taste...?). Anyway, so I'm trying to DIY the current furniture so that it fits with our idea of a cosy living area.

Today I want to share a little inspiration. The way I WANT our living room to look like. Enjoy!

(Please Pin from original source)


 Source unknown, please comment if you know


Do you think I can achieve this style? Stay tuned for improvements along the way.

Happy dreaming!


See you soon...


Linking up to:

Link party every Wednesday over at the36thavenue.com  HookingupwithHoH  Shine on Friday   All Our Days  ThePinJunkie   PIN MEme  Check me out Saturdays  Link-Party-Button  Too Much Time On My Hands    {nifty button}  Here's to Handy Andy      Who Needs a Cape?  Linky
  
Related Posts Plugin for WordPress, Blogger...